Professional Development Friday: Part 3 of our Infrastructure as Code Mastery Series
Last week, we built your first production-ready infrastructure using Terraform—a complete web application with proper networking, security, and monitoring. You deployed real cloud resources and experienced the fundamental workflow that defines Infrastructure as Code practice. That foundation represents the technical competency that organisations recognise when evaluating cloud professionals.
Today, we tackle the challenge that transforms basic Terraform knowledge into enterprise-valuable expertise: managing identical infrastructure across multiple environments with appropriate variations. This capability distinguishes senior practitioners from casual users, directly influencing career advancement and compensation in organisations that operate complex, multi-stage deployment pipelines.
The patterns we’ll implement today appear in every serious Infrastructure as Code deployment. Whether you’re supporting a start-up’s development workflow or managing enterprise applications serving millions of users, the ability to promote infrastructure changes safely through environments represents core professional competency.
According to recent industry data, professionals who demonstrate multi-environment infrastructure management skills command salaries 15-20% above those with basic automation capabilities. This premium reflects the strategic value organisations place on reducing deployment risks whilst enabling rapid development cycles.
The Enterprise Reality: Why Multi-Environment Management Matters
Professional software development requires isolated environments that enable parallel work streams without interfering with production systems. Developers need environments for feature development, quality assurance teams require stable platforms for testing, and production systems must remain available whilst accommodating continuous deployment requirements.
Traditional approaches create these environments manually, leading to configuration drift that invalidates testing and creates deployment surprises. When development environments differ from production systems, applications that work perfectly in testing fail catastrophically when promoted to live traffic. These failures create career-limiting incidents for the professionals responsible.
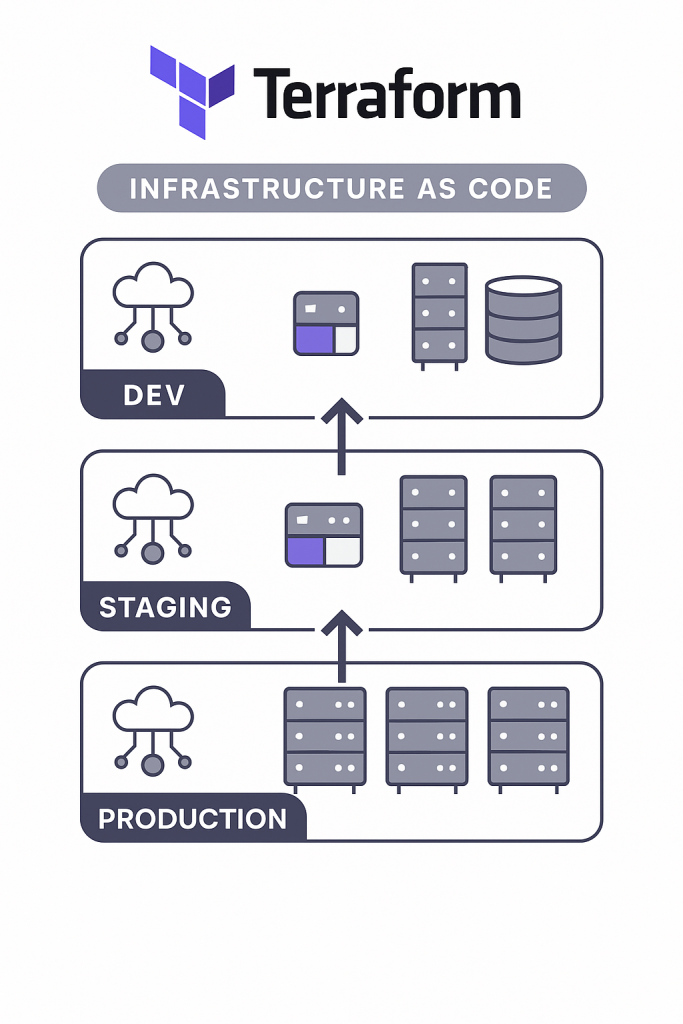
Infrastructure as Code eliminates this problem through environmental consistency maintained automatically. The same Terraform configuration that creates development infrastructure deploys production systems, ensuring that testing occurs against architecturally identical platforms. Only size, performance characteristics, and security constraints vary between environments.
This consistency enables deployment practices that modern organisations demand: continuous integration pipelines that deploy multiple times daily, automated testing that validates changes before production promotion, and disaster recovery processes that restore service rapidly through automated infrastructure recreation.
Core Concepts: Terraform Environment Management Strategies
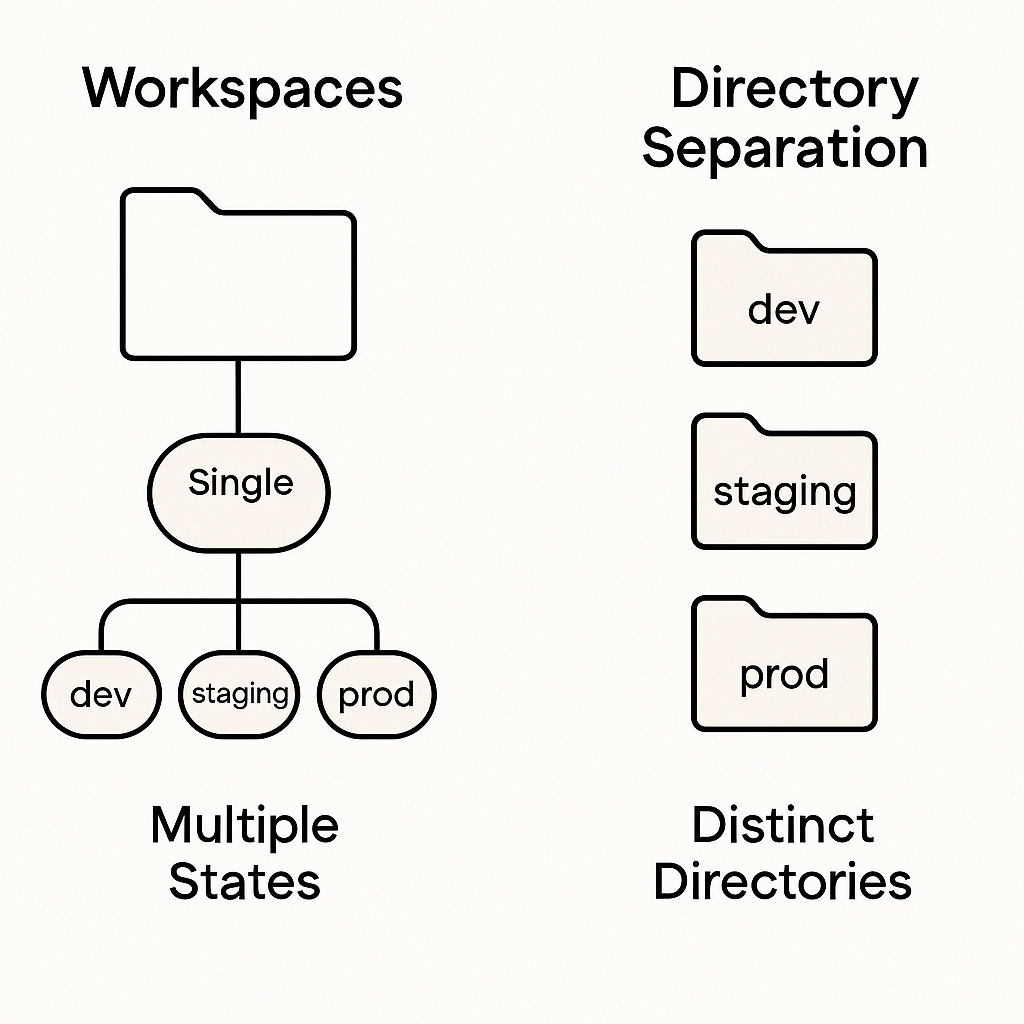
Professional Terraform implementations manage multiple environments through two primary approaches, each suited to different organisational requirements and team structures. Understanding both strategies enables appropriate selection based on project constraints whilst demonstrating strategic thinking that characterises senior infrastructure roles.
Terraform Workspaces provide environment isolation within a single configuration directory. Each workspace maintains separate state files whilst sharing the same Terraform configuration. This approach minimises code duplication whilst enabling environment-specific variable values and resource sizing. Workspaces work well for teams with similar environment requirements and straightforward deployment processes.
Directory-Based Separation organises environments into distinct directories with separate configuration files. Each environment has dedicated Terraform state and configuration, enabling environment-specific architectural decisions whilst sharing common modules. This approach suits complex environments with significantly different requirements or regulatory constraints that demand physical separation.
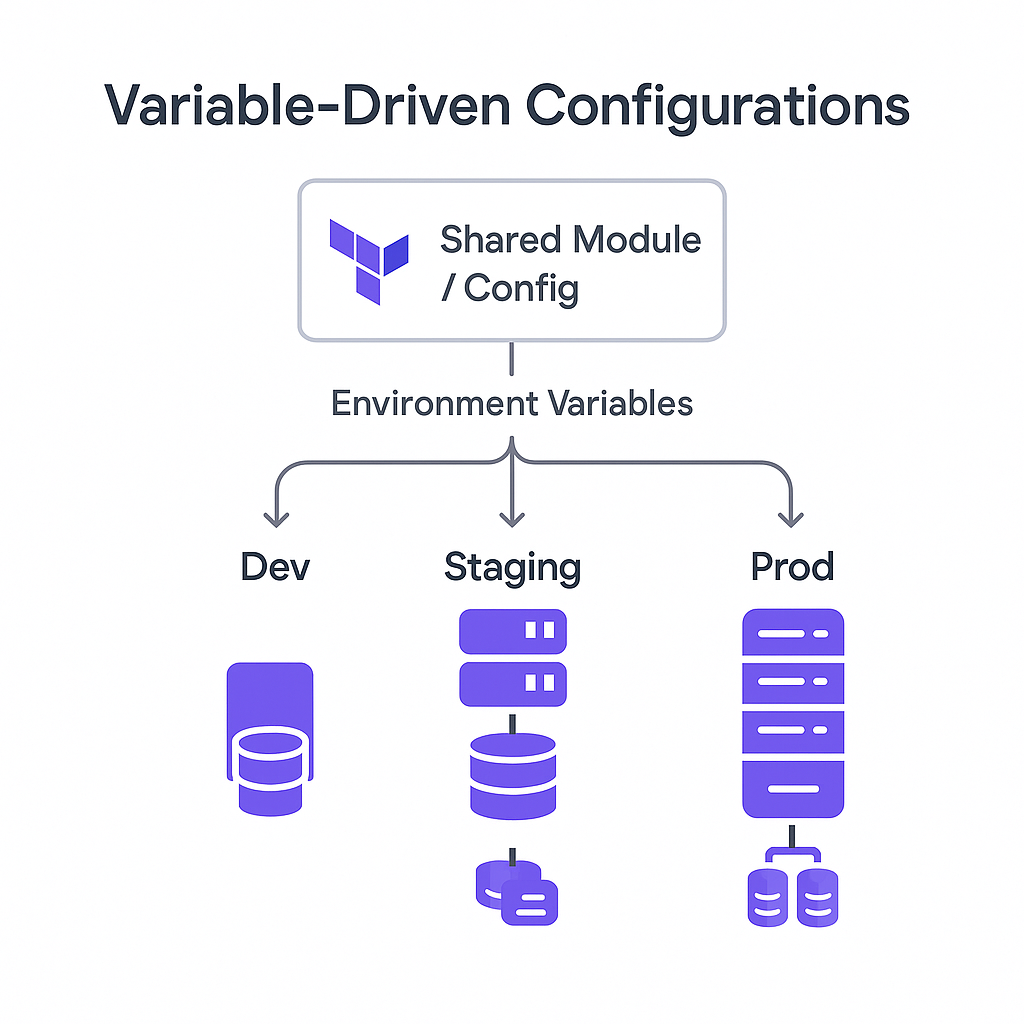
Variable-Driven Configuration enables both strategies by parameterising infrastructure characteristics through input variables. Resource sizing, networking configurations, and feature flags become variables that accept different values per environment. This flexibility enables identical infrastructure logic with environment-appropriate scaling and security settings.
The strategy you choose affects team collaboration patterns, deployment complexity, and operational management approaches. Professional implementations often combine approaches: using workspaces for straightforward applications whilst implementing directory separation for complex systems with environment-specific compliance requirements.
Hands-On Implementation: Building Multi-Environment Infrastructure
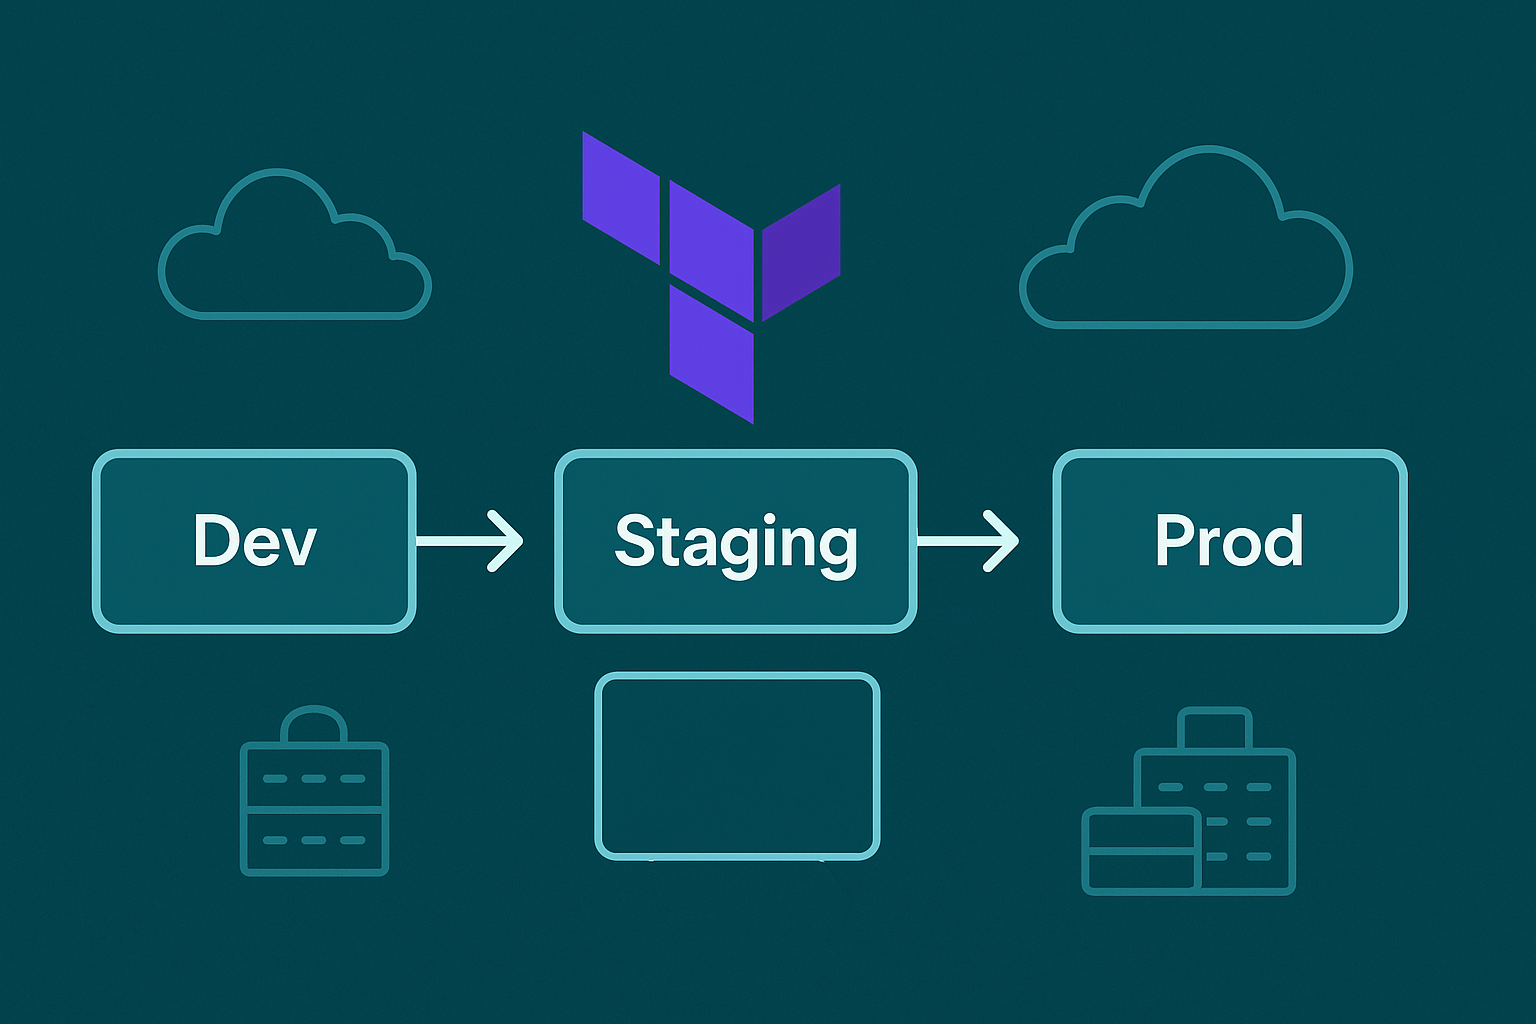
Let’s extend last week’s web application to support development, staging, and production environments using Terraform workspaces. This implementation demonstrates patterns that scale to enterprise architectures whilst remaining comprehensible for learning purposes.
Step 1: Enhanced Variable Configuration
First, we’ll enhance our variable system to support environment-specific configurations:
# variables.tf
variable "aws_region" {
  description = "AWS region for resources"
  type        = string
  default     = "eu-west-2"
}

variable "project_name" {
  description = "Name prefix for all resources"
  type        = string
  default     = "iac-demo"
}

variable "environment" {
  description = "Environment name (dev, staging, prod)"
  type        = string
  validation {
    condition = contains(["dev", "staging", "prod"], var.environment)
    error_message = "Environment must be dev, staging, or prod."
  }
}

variable "instance_type" {
  description = "EC2 instance type"
  type        = string
  default     = "t3.micro"
}

variable "min_size" {
  description = "Minimum number of instances"
  type        = number
  default     = 1
}

variable "max_size" {
  description = "Maximum number of instances"
  type        = number
  default     = 3
}

variable "desired_capacity" {
  description = "Desired number of instances"
  type        = number
  default     = 1
}

# Environment-specific configurations
locals {
  environment_configs = {
    dev = {
      instance_type     = "t3.micro"
      min_size         = 1
      max_size         = 2
      desired_capacity = 1
      enable_monitoring = false
      backup_retention = 1
    }
    staging = {
      instance_type     = "t3.small"
      min_size         = 1
      max_size         = 2
      desired_capacity = 1
      enable_monitoring = true
      backup_retention = 7
    }
    prod = {
      instance_type     = "t3.medium"
      min_size         = 2
      max_size         = 6
      desired_capacity = 2
      enable_monitoring = true
      backup_retention = 30
    }
  }

  config = local.environment_configs[var.environment]
}
This configuration system demonstrates professional patterns: input validation prevents invalid environment names, local values compute environment-specific settings, and the structure enables easy modification without code changes.
Step 2: Enhanced Networking with Environment Considerations
# networking.tf
resource "aws_vpc" "main" {
  cidr_block           = "10.0.0.0/16"
  enable_dns_hostnames = true
  enable_dns_support   = true

  tags = {
    Name        = "${var.project_name}-${var.environment}-vpc"
    Environment = var.environment
    Project     = var.project_name
  }
}

resource "aws_internet_gateway" "main" {
  vpc_id = aws_vpc.main.id

  tags = {
    Name        = "${var.project_name}-${var.environment}-igw"
    Environment = var.environment
    Project     = var.project_name
  }
}

resource "aws_subnet" "public" {
  count                   = 2
  vpc_id                  = aws_vpc.main.id
  cidr_block              = "10.0.${count.index + 1}.0/24"
  availability_zone       = data.aws_availability_zones.available.names[count.index]
  map_public_ip_on_launch = true

  tags = {
    Name        = "${var.project_name}-${var.environment}-public-${count.index + 1}"
    Environment = var.environment
    Project     = var.project_name
    Type        = "public"
  }
}

resource "aws_subnet" "private" {
  count             = 2
  vpc_id            = aws_vpc.main.id
  cidr_block        = "10.0.${count.index + 10}.0/24"
  availability_zone = data.aws_availability_zones.available.names[count.index]

  tags = {
    Name        = "${var.project_name}-${var.environment}-private-${count.index + 1}"
    Environment = var.environment
    Project     = var.project_name
    Type        = "private"
  }
}

# NAT Gateway for private subnets (prod and staging only)
resource "aws_eip" "nat" {
  count  = var.environment != "dev" ? 1 : 0
  domain = "vpc"

  tags = {
    Name        = "${var.project_name}-${var.environment}-nat-eip"
    Environment = var.environment
  }

  depends_on = [aws_internet_gateway.main]
}

resource "aws_nat_gateway" "main" {
  count         = var.environment != "dev" ? 1 : 0
  allocation_id = aws_eip.nat[0].id
  subnet_id     = aws_subnet.public[0].id

  tags = {
    Name        = "${var.project_name}-${var.environment}-nat"
    Environment = var.environment
  }

  depends_on = [aws_internet_gateway.main]
}

resource "aws_route_table" "private" {
  count  = var.environment != "dev" ? 1 : 0
  vpc_id = aws_vpc.main.id

  route {
    cidr_block     = "0.0.0.0/0"
    nat_gateway_id = aws_nat_gateway.main[0].id
  }

  tags = {
    Name        = "${var.project_name}-${var.environment}-private-rt"
    Environment = var.environment
  }
}

resource "aws_route_table_association" "private" {
  count          = var.environment != "dev" ? length(aws_subnet.private) : 0
  subnet_id      = aws_subnet.private[count.index].id
  route_table_id = aws_route_table.private[0].id
}
Notice how this configuration adapts to environment requirements: development environments skip NAT gateways for cost savings, whilst staging and production include private networking for security. This conditional logic demonstrates the cost optimisation thinking that organisations value.
Step 3: Auto Scaling Group for Resilience
# autoscaling.tf
resource "aws_launch_template" "web" {
  name_prefix   = "${var.project_name}-${var.environment}-"
  image_id      = data.aws_ami.amazon_linux.id
  instance_type = local.config.instance_type
  key_name      = var.key_name # Add this variable for SSH access

  vpc_security_group_ids = [aws_security_group.web.id]

  user_data = base64encode(templatefile("${path.module}/user_data.sh", {
    project_name = var.project_name
    environment  = var.environment
  }))

  tag_specifications {
    resource_type = "instance"
    tags = {
      Name        = "${var.project_name}-${var.environment}-web"
      Environment = var.environment
      Project     = var.project_name
    }
  }

  lifecycle {
    create_before_destroy = true
  }
}

resource "aws_autoscaling_group" "web" {
  name                = "${var.project_name}-${var.environment}-asg"
  vpc_zone_identifier = aws_subnet.public[*].id
  min_size            = local.config.min_size
  max_size            = local.config.max_size
  desired_capacity    = local.config.desired_capacity
  health_check_type   = "ELB"
  health_check_grace_period = 300

  launch_template {
    id      = aws_launch_template.web.id
    version = "$Latest"
  }

  tag {
    key                 = "Name"
    value               = "${var.project_name}-${var.environment}-asg"
    propagate_at_launch = false
  }

  tag {
    key                 = "Environment"
    value               = var.environment
    propagate_at_launch = true
  }

  lifecycle {
    create_before_destroy = true
  }
}

resource "aws_lb" "web" {
  name               = "${var.project_name}-${var.environment}-alb"
  internal           = false
  load_balancer_type = "application"
  security_groups    = [aws_security_group.alb.id]
  subnets            = aws_subnet.public[*].id

  enable_deletion_protection = var.environment == "prod"

  tags = {
    Name        = "${var.project_name}-${var.environment}-alb"
    Environment = var.environment
  }
}

resource "aws_lb_target_group" "web" {
  name     = "${var.project_name}-${var.environment}-tg"
  port     = 80
  protocol = "HTTP"
  vpc_id   = aws_vpc.main.id

  health_check {
    enabled             = true
    healthy_threshold   = 2
    interval            = 30
    matcher             = "200"
    path                = "/"
    port                = "traffic-port"
    protocol            = "HTTP"
    timeout             = 5
    unhealthy_threshold = 2
  }

  tags = {
    Name        = "${var.project_name}-${var.environment}-tg"
    Environment = var.environment
  }
}

resource "aws_lb_listener" "web" {
  load_balancer_arn = aws_lb.web.arn
  port              = "80"
  protocol          = "HTTP"

  default_action {
    type             = "forward"
    target_group_arn = aws_lb_target_group.web.arn
  }
}

resource "aws_autoscaling_attachment" "web" {
  autoscaling_group_name = aws_autoscaling_group.web.id
  lb_target_group_arn    = aws_lb_target_group.web.arn
}
Step 4: Enhanced Security Groups
# security.tf
resource "aws_security_group" "alb" {
  name_prefix = "${var.project_name}-${var.environment}-alb-"
  vpc_id      = aws_vpc.main.id
  description = "Security group for Application Load Balancer"

  ingress {
    description = "HTTP"
    from_port   = 80
    to_port     = 80
    protocol    = "tcp"
    cidr_blocks = ["0.0.0.0/0"]
  }

  ingress {
    description = "HTTPS"
    from_port   = 443
    to_port     = 443
    protocol    = "tcp"
    cidr_blocks = ["0.0.0.0/0"]
  }

  egress {
    from_port   = 0
    to_port     = 0
    protocol    = "-1"
    cidr_blocks = ["0.0.0.0/0"]
  }

  tags = {
    Name        = "${var.project_name}-${var.environment}-alb-sg"
    Environment = var.environment
  }

  lifecycle {
    create_before_destroy = true
  }
}

resource "aws_security_group" "web" {
  name_prefix = "${var.project_name}-${var.environment}-web-"
  vpc_id      = aws_vpc.main.id
  description = "Security group for web servers"

  ingress {
    description     = "HTTP from ALB"
    from_port       = 80
    to_port         = 80
    protocol        = "tcp"
    security_groups = [aws_security_group.alb.id]
  }

  # SSH access - more restrictive in production
  dynamic "ingress" {
    for_each = var.environment == "prod" ? [] : [1]
    content {
      description = "SSH"
      from_port   = 22
      to_port     = 22
      protocol    = "tcp"
      cidr_blocks = ["10.0.0.0/16"]
    }
  }

  egress {
    from_port   = 0
    to_port     = 0
    protocol    = "-1"
    cidr_blocks = ["0.0.0.0/0"]
  }

  tags = {
    Name        = "${var.project_name}-${var.environment}-web-sg"
    Environment = var.environment
  }

  lifecycle {
    create_before_destroy = true
  }
}
Step 5: Environment-Specific Monitoring
# monitoring.tf
resource "aws_cloudwatch_log_group" "web" {
  count             = local.config.enable_monitoring ? 1 : 0
  name              = "/aws/ec2/${var.project_name}-${var.environment}"
  retention_in_days = local.config.backup_retention

  tags = {
    Name        = "${var.project_name}-${var.environment}-logs"
    Environment = var.environment
  }
}

resource "aws_cloudwatch_metric_alarm" "high_cpu" {
  count               = local.config.enable_monitoring ? 1 : 0
  alarm_name          = "${var.project_name}-${var.environment}-high-cpu"
  comparison_operator = "GreaterThanThreshold"
  evaluation_periods  = "2"
  metric_name         = "CPUUtilization"
  namespace           = "AWS/EC2"
  period              = "120"
  statistic           = "Average"
  threshold           = "80"
  alarm_description   = "This metric monitors ec2 cpu utilization"
  alarm_actions       = [] # Add SNS topic ARN for notifications

  dimensions = {
    AutoScalingGroupName = aws_autoscaling_group.web.name
  }

  tags = {
    Name        = "${var.project_name}-${var.environment}-cpu-alarm"
    Environment = var.environment
  }
}
Environment Configuration Files
Create environment-specific variable files to manage different deployments:
terraform.tfvars.dev:
environment = "dev"
key_name    = "your-dev-key"
terraform.tfvars.staging:
environment = "staging"
key_name    = "your-staging-key"
terraform.tfvars.prod:
environment = "prod"
key_name    = "your-prod-key"
Workspace Management: Professional Deployment Workflow
Terraform workspaces enable environment management through a structured workflow that mirrors professional deployment practices:
# Create and switch to development workspace
terraform workspace new dev
terraform workspace select dev
terraform apply -var-file="terraform.tfvars.dev"

# Create staging environment
terraform workspace new staging
terraform workspace select staging
terraform apply -var-file="terraform.tfvars.staging"

# Deploy to production
terraform workspace new prod
terraform workspace select prod
terraform apply -var-file="terraform.tfvars.prod"

# List all workspaces
terraform workspace list

# Show current workspace
terraform workspace show
Each workspace maintains separate state files whilst sharing the same configuration. This separation prevents accidental cross-environment modifications whilst enabling consistent infrastructure patterns.
Remote State Management: Enabling Team Collaboration
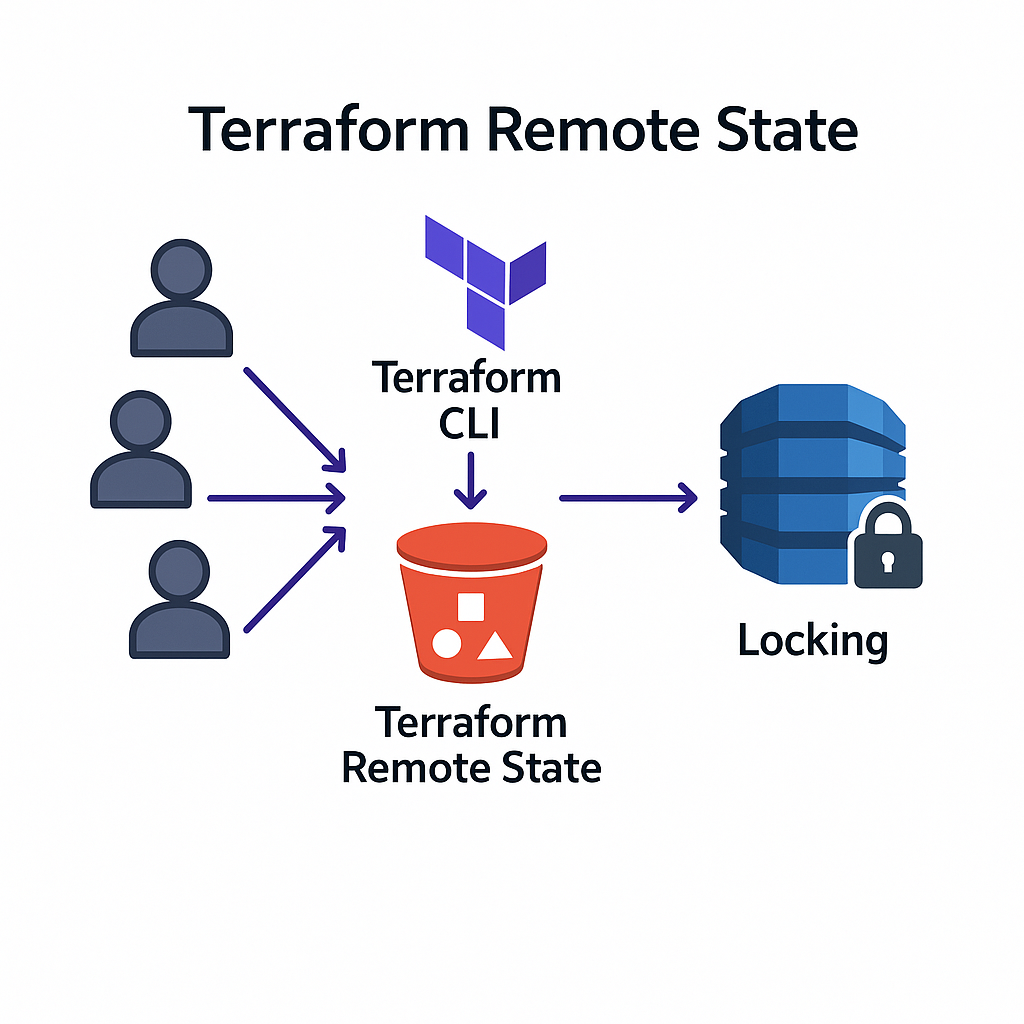
Professional Terraform implementations require remote state storage that enables team collaboration whilst maintaining security. Configure S3 backend for shared state management:
# backend.tf
terraform {
  backend "s3" {
    bucket         = "your-terraform-state-bucket"
    key            = "infrastructure/terraform.tfstate"
    region         = "eu-west-2"
    dynamodb_table = "terraform-state-locks"
    encrypt        = true
  }
}
This configuration enables multiple team members to modify infrastructure safely whilst preventing concurrent modifications that could corrupt state. The DynamoDB table provides state locking, ensuring only one person modifies infrastructure at a time.
Professional Patterns: Environment-Specific Considerations
The implementation demonstrates patterns that appear in every enterprise Infrastructure as Code deployment. Cost optimisation thinking appears through environment-specific resource sizing and optional components. Security considerations vary appropriately: development environments prioritise accessibility, production systems emphasise protection.
The monitoring configuration illustrates operational maturity: development environments skip expensive monitoring to reduce costs, production systems include comprehensive observability for incident response. These decisions reflect the business thinking that characterises senior technical roles.
Tagging strategies enable operational management at scale. Consistent tag application across all resources supports cost tracking, automated policy enforcement, and operational organisation. These capabilities become essential in multi-team environments with complex compliance requirements.
The conditional logic throughout the configuration demonstrates sophisticated Terraform usage. Dynamic blocks, count parameters, and local values create flexible infrastructure that adapts to different requirements without code duplication. This approach enables maintaining single configuration whilst supporting diverse operational needs.
Deployment Strategy: Promoting Changes Safely
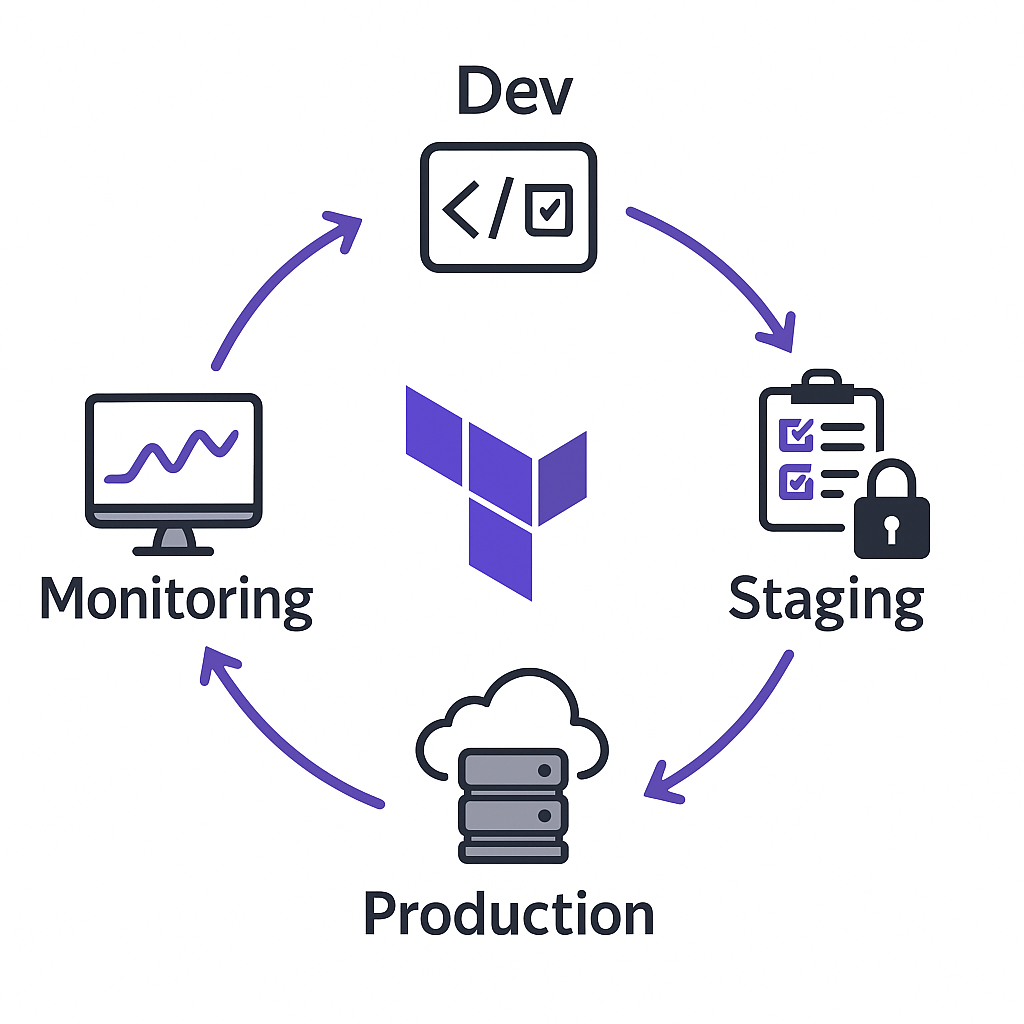
Professional deployment workflows promote changes through environments systematically, validating functionality before affecting production systems. The infrastructure we’ve created enables this progression through workspace-based isolation.
Deploy changes to development first, validate functionality through automated testing or manual verification, then promote to staging for integration testing. Only after staging validation should changes reach production systems. This progression minimises risk whilst enabling rapid iteration on infrastructure improvements.
The Auto Scaling Group configuration enables zero-downtime deployments through instance replacement. When launch template changes occur, new instances deploy with updated configurations whilst old instances remain available until health checks pass. This capability enables continuous infrastructure evolution without service interruption.
Career Impact: Skills That Command Premium Compensation
The patterns demonstrated in this implementation directly correlate with career advancement in cloud infrastructure roles. Multi-environment management capabilities distinguish infrastructure engineers from basic automation practitioners, affecting both role responsibilities and compensation levels.
Platform engineering positions—among the fastest-growing roles in technology—require exactly these skills. Creating infrastructure that enables other developers whilst maintaining operational stability represents the technical leadership that organisations value. Professionals who demonstrate these capabilities advance to architectural roles that influence organisational strategy.
The operational thinking embedded in this implementation—cost optimisation, security graduation, monitoring sophistication—reflects the business awareness that senior technical roles require. Infrastructure decisions affect organisational efficiency, security posture, and operational costs. Professionals who understand these connections advance beyond purely technical responsibilities.
Common Challenges: Enterprise Implementation Reality
Multi-environment infrastructure management introduces complexity that requires careful consideration. State management becomes critical when multiple people modify infrastructure across different environments. Remote state storage with proper access controls prevents conflicts whilst enabling collaboration.
Secret management requires sophisticated approaches in multi-environment deployments. Database passwords, API keys, and certificates must vary between environments whilst remaining secure. Tools like AWS Secrets Manager or HashiCorp Vault integrate with Terraform to manage sensitive values appropriately.
Environment promotion strategies must balance safety with development velocity. Automated testing validates infrastructure changes before promotion, whilst manual approval processes ensure human oversight of production modifications. The balance depends on organisational risk tolerance and operational maturity.
Preparing for Advanced Patterns: Module Development
Next week’s post, “Module Magic: Writing Reusable Infrastructure Code,” builds on this multi-environment foundation to address code reuse and organisational standardisation. The patterns we’ve implemented demonstrate the complexity that modules help manage through abstraction and reusability.
Before then, experiment with the workspace workflow. Deploy infrastructure to multiple environments, modify configurations, and observe how changes propagate through your deployment pipeline. Understanding the operational implications prepares you for the architectural thinking that characterises senior infrastructure roles.
Consider the business impact of what you’ve built. How does environment consistency affect development velocity? What cost implications result from environment-specific sizing? How does monitoring sophistication affect incident response capabilities? These questions guide the strategic thinking that influences career advancement.
The transition from single-environment to multi-environment infrastructure management represents a fundamental capability leap that organisations recognise and compensate accordingly. Each pattern you’ve mastered builds towards expertise that enables participation in architectural decisions that affect entire organisations.
Complete Workspace Commands Reference
# Workspace management
terraform workspace new <environment>
terraform workspace select <environment>
terraform workspace list
terraform workspace show
terraform workspace delete <environment>

# Environment-specific deployments
terraform plan -var-file="terraform.tfvars.dev"
terraform apply -var-file="terraform.tfvars.dev"
terraform destroy -var-file="terraform.tfvars.dev"

# Cross-environment operations
terraform workspace select dev && terraform output
terraform workspace select staging && terraform output
terraform workspace select prod && terraform output
Useful Links
- Terraform Workspaces Documentation – Complete workspace management guide
- Remote State Configuration – S3 backend setup and best practices
- AWS Auto Scaling Groups – Understanding ASG concepts and configuration
- Terraform Dynamic Blocks – Advanced configuration techniques
- Environment-Specific Variables – Variable files and environment management
- AWS Load Balancer Configuration – ALB setup and best practices
- Terraform Local Values – Advanced variable computation patterns
- AWS CloudWatch Monitoring – Monitoring and alerting configuration
- State Locking with DynamoDB – Preventing concurrent modifications
- Terraform Conditional Expressions – Environment-specific logic patterns